There is a flashcard app for Ruby on Rails developers at https://www.brainscape.com/learn/ruby-on-rails that we will replicate here in a much simpler fashion.
Ours is much similar, with plenty of room for creative freedom. Here is a look at the project (two screens, one to show the command and the flipside to show the definition):


Flashcards Part 1: Representing, Creating, and Displaying Cards
-
Create a new Empty Activity project called "Flashcards" (storyboard UI). If you want an AppIcon for this app, you can get one here or create one here. Be sure to use the largest icon and rename it to only include lowercase characters and numbers. Within the project, create a new, blank Kotlin file called Flashcard.kt and create a simple model named Flashcard within this file to represent the essence of a flashcard. In this case, that means the model has the following:
- an instance variable called
command of type String (this is the front of the flashcard with the rails command).
- an instance variable called
definition also of type String (this is the back of the flashcard with what the rails command does).
- a constructor method that takes a command string and a definition string as arguments and sets the appropriate instance variables.
In this case use a data class not a class for this model since this model has only state (properties) and not behavior (methods). (This is similar to structs in Swift discussed in class, but we will observe this practice here).
-
Create another new file called Deck.kt that will help represent a series of flashcards. Within this file, we will define a new class called Deck. This will be a class since it will have both state and behavior. For the state, create an instance variable called cards which will be an array of Flashcard objects (using the Data Class we created earlier). Afterwards, in the init method, set the body of the method to the following code:
    val cardData = mapOf("rails generate model ModelName" to "Creates a model with the specified model_name",
    "rails generate migration MigrationName" to "Creates a migration with the specified migration_name",
    "rails generate controller ControllerName" to "Creates a controller with the specified controller_name",
    "rails generate scaffold ModelName" to "Provides shortcut for creating your controller, model and view files in one step",
    "rails destroy scaffold ModelName" to "Destroys the created controller, model and view files that were generated for the given Model",
    "rails server" to "Starts ruby server at http://localhost:3000",
    "rails console" to "Opens the rails console for the current RAILS_ENV",
    "rake test:units" to "Runs all unit tests for the application",
    "rake -T" to "Lists all available rake tasks",
    "rake db:create" to "Creates the database defined in config/database.yml for the current RAILS_ENV",
    "rake db:migrate" to "Migrates teh database through scripts in the db/migrate directory",
    "rake db:drop" to "Drops the database for the current RAILS_ENV",
    "rake db:reset" to "Drops and recreates the database from db/schema.rb for the current environment",
    "rake db:rollback" to "Runs the down method from the latest migration",
    "rake doc:app" to "Builds the RDoc HTML files",
    "gem list" to "lists the gems that this rails application depends on",
    "gem server" to "Presents a web page at http://localhost:8808/ with info about installed gems",
    "bundle install" to "Installs all required gems for this application",
    "rake log:clear" to "Truncates all *.log files in log/ to zero bytes",
    "rake routes" to "Prints out all the defined routes in match order with names",
    "rake tmp:clear" to "Clears session, cache and socket files from tmp/",
    "rake test:benchmark" to "Benchmarks your application"
    )

      // Now create a simple way to loop through the dictionary and create a Flashcard object
      // for each card and add that object to the `cards` array we created as an instance variable.
      // This can be done in one line using a closure and I'd encourage you to do so.
Replace the comment above with the appropriate closure. (hint: use map() and toTypedArray()) After that add a method that draw a random card (see below):
fun drawRandomCard() : Flashcard? {
        return if (cards.isEmpty()) {  // shouldn't ever really be an issue; just being safe...
            null
        } else {
            // return a flashcard object from the deck of cards
            cards.random()
        }
    }
-
Now switch to the Main Activity code. Here, we are going to create a new deck as well as an optional to hold a flashcard object from that deck:
val deck = Deck()
var flashcard: Flashcard? = null
-
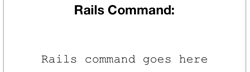
We need some way to display this information. Add some text views to the main view as seen below. Then turn the lower text view into an outlet called commandLabel.
Note that you will need to tweak the text view in the attributes to allow for multiple lines. To allow this, set the number of lines to 0 and then expand the size of the box to allow for more content to be seen. Be sure to then make the gravity center to center the text as well if you do so!
-
Now we need to display the flashcard's command property in the in the commandLabel. To do that, add to the onCreate() method this code that will draw and display a random flashcard. Remember that flashcard is technically an optional, so we will safely unpack it with ?:
flashcard = deck.drawRandomCard()
commandLabel.text = flashcard?.command ?: "null"
Build and run the app to see that it is randomly drawing and displaying the contents of a card. For now you should see the bottom portion of the flashcard updating with a new rails command, with the top unchanged. It should look something like this (with a new command generated each time):
<img src="https://i.imgur.com/B4phCIl.png" width="50%"/>
We will now work to make our flashcards flippable and add the definition to the cards as well.
Flashcards Part 2: Adding Navigation
-
Create an empty fragment by right-clicking on app and selecting New > Fragment > Fragment (Blank). Call this fragment DefinitionFragment.
-
Add the following code to this new class:
class DefinitionFragment : Fragment() {
    private var command:String? = null
    private var definition:String? = null

    override fun onCreate(savedInstanceState: Bundle?) {
        super.onCreate(savedInstanceState)
        arguments?.let {
            command = it.getString("command")
            definition = it.getString("definition")
        }
    }

    override fun onCreateView(
        inflater: LayoutInflater,
        container: ViewGroup?,
        savedInstanceState: Bundle?
    ): View? {
        val myInflatedView: View = inflater.inflate(R.layout.fragment_definition, container, false)
        val t = myInflatedView.findViewById<View>(R.id.definitionLabel) as TextView
        t.text = command ?: "null"
        val t2 = myInflatedView.findViewById<View>(R.id.railsDefinition) as TextView
        t2.text = definition ?: "null"
        return myInflatedView

companion object {
        @JvmStatic fun newInstance(param1: String, param2: String) =
            DefinitionFragment().apply {
                arguments = Bundle().apply {
                    putString("command", param1)
                    putString("definition", param2)
                }
            }
    }
}
Ensure that the text views being referred to in this class exist in fragment_definition.xml
- Add the following function to
MainActivity.kt
fun onClickInfo(view: View){
        val transaction = supportFragmentManager.beginTransaction()
        val fragment = DefinitionFragment.newInstance(flashcard?.command ?: "something", flashcard?.definition ?: "null")
        transaction.replace(R.id.home, fragment)
        transaction.addToBackStack(null)
        transaction.commit()
        flashcard = deck.drawRandomCard()
        val commandLabel = findViewById<TextView>(R.id.commandLabel)
        commandLabel.text = flashcard?.command ?: "null"
    }
If flashcard isn’t found then ensure it is declared outside of onCreate(). Notice that the members of flashcard are being passed to the definition fragment. The current flashcard is also being redrawn from the deck and the view updated afterwards.
- Add a button that calls
onClickInfo. Use the back button to return to the command view from the definition fragment.